1
2
3
4
5
6
7
8
9
10
11
12
13
14
15
16
17
18
19
20
21
22
23
24
25
26
27
28
29
30
31
32
33
34
35
36
37
38
39
40
41
42
43
44
45
46
47
48
49
50
51
52
53
54
55
56
57
58
59
60
61
62
63
64
65
66
67
68
69
70
71
72
73
74
75
76
77
78
79
80
81
82
83
84
85
86
87
88
89
90
|
# GPU Screen Recorder
This is a screen recorder that has minimal impact on system performance by recording a window using the GPU only,
similar to shadowplay on windows. This is the fastest screen recording tool for Linux.
This screen recorder can be used for recording your desktop offline, for live streaming and for nvidia shadowplay-like instant replay,
where only the last few seconds are saved.
## Note
This software works only on X11 (Wayland with Xwayland is NOT supported).\
If you are using a variable refresh rate monitor then choose to record "screen-direct-force". This will allow variable refresh rate to work when recording fullscreen applications. Note that some applications such as mpv will not work in fullscreen mode. A fix is being developed for this.
### TEMPORARY ISSUES
1) screen-direct capture has been temporary disabled as it causes issues with stuttering. This might be a nvfbc bug.
2) Recording the monitor on steam deck might fail sometimes. This happens even when using ffmpeg directly. This might be a steam deck driver bug. Recording a single window doesn't have this issue.
3) Videos created on AMD/Intel are in variable framerate format. Use MPV to play such videos, otherwise you might experience stuttering in the video if you are using a buggy video player.
### AMD/Intel root permission
When recording a window under AMD/Intel no special user permission is required, however when recording a monitor the program needs root permission (to access KMS).
To make this safer, the part that needs root access has been moved to its own executable (to make it as small as possible) and a GUI sudo prompt is shown to run this executable as root. The executable is called "gsr-kms-server".
However this doesn't work if you want to start replay at startup for example. To fix this, run: `sudo setcap cap_sys_admin+ep /usr/bin/gsr-kms-server` if you have installed GPU Screen Recorder.
# Performance
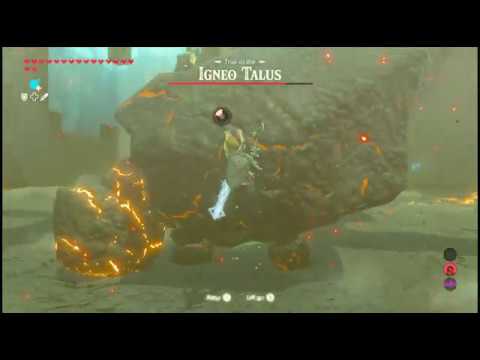
On a system with a i5 4690k CPU and a GTX 1080 GPU:\
When recording Legend of Zelda Breath of the Wild at 4k, fps drops from 30 to 7 when using OBS Studio + nvenc, however when using this screen recorder the fps remains at 30.\
When recording GTA V at 4k on highest settings, fps drops from 60 to 23 when using obs-nvfbc + nvenc, however when using this screen recorder the fps only drops to 58. The quality is also much better when using gpu-screen-recorder.\
It is recommended to save the video to a SSD because of the large file size, which a slow HDD might not be fast enough to handle.\
Note that if you have a very powerful CPU and a not so powerful GPU and play a game that is bottlenecked by your GPU and barely uses your CPU then a CPU based screen recording (such as OBS with libx264 instead of nvenc) might perform slightly better than GPU Screen Recorder. At least on NVIDIA.
## Note about optimal performance on NVIDIA
NVIDIA driver has a "feature" (read: bug) where it will downclock memory transfer rate when a program uses cuda (or nvenc, which uses cuda), such as GPU Screen Recorder. To work around this bug, GPU Screen Recorder can overclock your GPU memory transfer rate to it's normal optimal level.\
To enable overclocking for optimal performance use the `-oc` option when running GPU Screen Recorder. You also need to have "Coolbits" NVIDIA X setting set to "12" to enable overclocking. You can automatically add this option if you run `sudo install_coolbits.sh` and then reboot your computer. This script is automatically run if you are using NVIDIA and run `install.sh`.\
Note that this only works when Xorg server is running as root, and using this option will only give you a performance boost if the game you are recording is bottlenecked by your GPU.\
Note! use at your own risk!
## Note about optimal performance on AMD/Intel
Performance is the same when recording a single window or the monitor, however in some cases, such as when gpu usage is 100%, the video capture rate might be slower than the games fps when recording a single window instead of a monitor. Recording the monitor instead is recommended in such cases.
# Installation
If you are running an Arch Linux based distro, then you can find gpu screen recorder on aur under the name gpu-screen-recorder-git (`yay -S gpu-screen-recorder-git`).\
If you are running another distro then you can run `sudo ./install.sh`, but you need to manually install the dependencies, as described below.\
You can also install gpu screen recorder ([the gtk gui version](https://git.dec05eba.com/gpu-screen-recorder-gtk/)) from [flathub](https://flathub.org/apps/details/com.dec05eba.gpu_screen_recorder), which is the easiest method
to install GPU Screen Recorder on non-arch based distros.
# Dependencies
## AMD
`libglvnd (which provides libgl and libegl), mesa, ffmpeg (libavcodec, libavformat, libavutil, libswresample, libavfilter), libx11, libxcomposite, libxrandr, libxfixes, libpulse, libva, libva-mesa-driver, libdrm, libcap, polkit (for pkexec)`.
## Intel
`libglvnd (which provides libgl and libegl), mesa, ffmpeg (libavcodec, libavformat, libavutil, libswresample, libavfilter), libx11, libxcomposite, libxrandr, libxfixes, libpulse, libva, libva-intel-driver, libdrm, libcap, polkit (for pkexec)`.
## NVIDIA
`libglvnd (which provides libgl and libegl), ffmpeg (libavcodec, libavformat, libavutil, libswresample, libavfilter), libx11, libxcomposite, libxrandr, libxfixes, libpulse, cuda (libnvidia-compute), nvenc (libnvidia-encode), libva, libdrm, libcap`. Additionally, you need to have `nvfbc (libnvidia-fbc1)` installed when using nvfbc and `xnvctrl (libxnvctrl0)` when using the `-oc` option.
# How to use
Run `scripts/interactive.sh` or run gpu-screen-recorder directly, for example: `gpu-screen-recorder -w $(xdotool selectwindow) -c mp4 -f 60 -a "$(pactl get-default-sink).monitor" -o test_video.mp4` then stop the screen recorder with Ctrl+C, which will also save the recording. You can change -w to -w screen if you want to record all monitors or if you want to record a specific monitor then you can use -w monitor-name, for example -w HDMI-0 (use xrandr command to find the name of your monitor. The name can also be found in your desktop environments display settings).\
Send signal SIGUSR1 (`killall -SIGUSR1 gpu-screen-recorder`) to gpu-screen-recorder when in replay mode to save the replay. The paths to the saved files is output to stdout after the recording is saved (note that all other text it output to stderr so you can ignore that text).\
You can find the default output audio device (headset, speakers (in other words, desktop audio)) with the command `pactl get-default-sink`. Add `monitor` to the end of that to use that as an audio input in gpu-screen-recorder.\
You can find the default input audio device (microphone) with the command `pactl get-default-source`. This input should not have `monitor` added to the end when used in gpu-screen-recorder.\
Example of recording both desktop audio and microphone: `gpu-screen-recorder -w $(xdotool selectwindow) -c mp4 -f 60 -a "$(pactl get-default-sink).monitor" -a "$(pactl get-default-source)" -o test_video.mp4`.\
A name (that is visible to pipewire) can be given to an audio input device by prefixing the audio input with `<name>/`, for example `dummy/alsa_output.pci-0000_00_1b.0.analog-stereo.monitor`.\
Note that if you use multiple audio inputs then they are each recorded into separate audio tracks in the video file. If you want to merge multiple audio inputs into one audio track then separate the audio inputs by "|" in one -a argument,
for example -a "alsa_output.pci-0000_00_1b.0.analog-stereo.monitor|bluez_0012.monitor".
There is also a gui for the gpu-screen-recorder called [gpu-screen-recorder-gtk](https://git.dec05eba.com/gpu-screen-recorder-gtk/).
## Simple way to run replay without gui
Run the script `scripts/start-replay.sh` to start replay and then `scripts/save-replay.sh` to save a replay and `scripts/stop-replay.sh` to stop the replay. The videos are saved to `$HOME/Videos`.
You can use these scripts to start replay at system startup if you add `scripts/start-replay.sh` to startup (this can be done differently depending on your desktop environment / window manager) and then go into hotkey settings on your system and choose a hotkey to run the script `scripts/save-replay.sh`. Modify `scripts/start-replay.sh` if you want to use other replay options.
## Issues
### NVIDIA
Nvidia drivers have an issue where CUDA breaks if CUDA is running when suspend/hibernation happens, and it remains broken until you reload the nvidia driver. To fix this, either disable suspend or tell the NVIDIA driver to preserve video memory on suspend/hibernate by using the `NVreg_PreserveVideoMemoryAllocations=1` option. You can run `install_preserve_video_memory.sh` to automatically add that option to your system.
# Demo
[](https://www.youtube.com/watch?v=n5tm0g01n6A)
# FAQ
## How is this different from using OBS with nvenc?
OBS only uses the gpu for video encoding, but the window image that is encoded is copied from the GPU to the CPU and then back to the GPU (video encoding unit). These operations are very slow and causes all of the fps drops when using OBS. OBS only uses the GPU efficiently on Windows 10 and Nvidia.\
This gpu-screen-recorder keeps the window image on the GPU and sends it directly to the video encoding unit on the GPU by using CUDA. This means that CPU usage remains at around 0% when using this screen recorder.
## How is this different from using OBS NvFBC plugin?
The plugin does everything on the GPU and gives the texture to OBS, but OBS does not know how to use the texture directly on the GPU so it copies the texture to the CPU and then back to the GPU (video encoding unit). These operations are very slow and causes a lot of fps drops unless you have a fast CPU. This is especially noticable when recording at higher resolutions than 1080p.
## How is this different from using FFMPEG with x11grab and nvenc?
FFMPEG only uses the GPU with CUDA when doing transcoding from an input video to an output video, and not when recording the screen when using x11grab. So FFMPEG has the same fps drop issues that OBS has.
## It tells me that my AMD/Intel GPU is not supported or that my GPU doesn't support h264/hevc, but that's not true!
Some linux distros disable hardware accelerated h264/hevc on AMD/Intel because of "patent license issues". If you are using an arch-based distro then you can install mesa-git instead of mesa and if you are using another distro then you may have to switch to a better distro.
# Donations
If you really want to donate, you can donate via bitcoin or monero.
* Bitcoin: bc1qqvuqnwrdyppf707ge27fqz2n9y9gu7lf5ypyuf
* Monero: 4An9kp2qW1C9Gah7ewv4JzcNFQ5TAX7ineGCqXWK6vQnhsGGcRpNgcn8r9EC3tMcgY7vqCKs3nSRXhejMHBaGvFdN2egYet
# TODO
* Dynamically change bitrate/resolution to match desired fps. This would be helpful when streaming for example, where the encode output speed also depends on upload speed to the streaming service.
* Show cursor when recording a window. Currently the cursor is only visible when recording a monitor.
* Implement opengl injection to capture texture. This fixes VRR without having to use NvFBC direct capture.
* Always use direct capture with NvFBC once the capture issue in mpv fullscreen has been resolved (maybe detect if direct capture fails in nvfbc and switch to non-direct recording. NvFBC says if direct capture fails).
|
